Hardware + Software Installation & Setup of BPA Auxiliary Customer Facing Display
If you need help setting up the customer display, our techs can take care of the entire setup process for you. Please contact 801-336-3303 for assistance.
Once you have the customer display attached to your Elite III system and powered on, you will also need to contact us to request the integration module required to run the customer display.
Hardware Installation
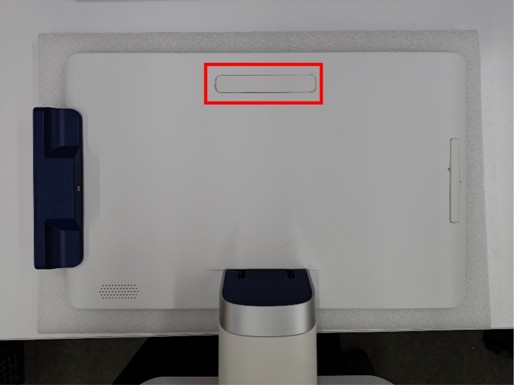
Step 1 — Remove the 2nd Cover
Place the Elite III terminal face down and remove the 2nd cover.
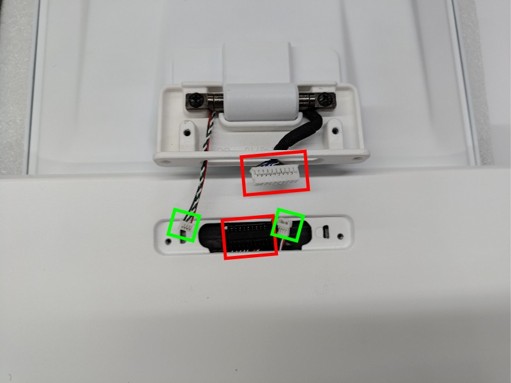
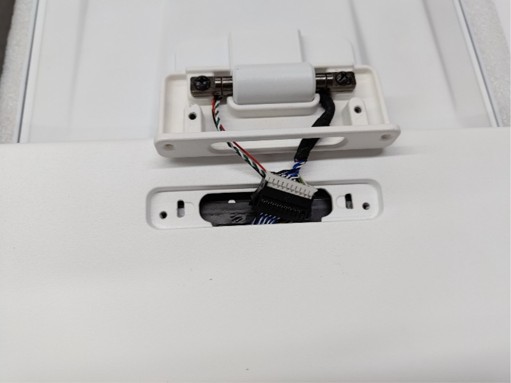
Step 2 — Connect the Video and Touch Cables
Connect the video and touch cables to their corresponding ports, matching the colors of the cables and ports.
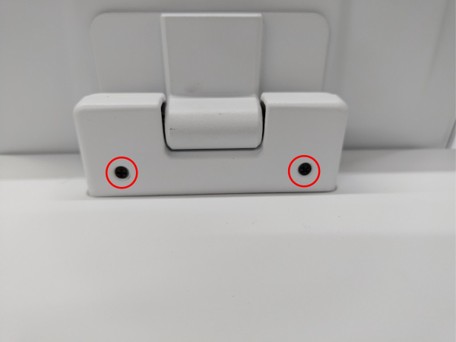
Step 3 — Secure the Fixing Screws
Secure the fixing screws using the two included screws.
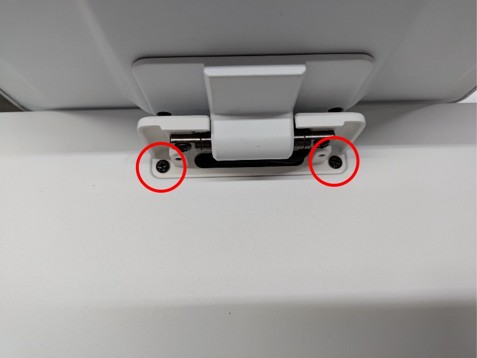
Step 4 — Secure the Lower Screen Cover
Tighten the two screws to secure the lower screen cover in place.
Software Setup
Step 5 — Power On the Elite III
Power on your Elite III terminal. The customer display will automatically turn on.
Step 6 — Request the Integration Module
Contact us to request the integration module required to run the customer display.
Let us take it from here
Once you have the customer display installed and powered on, please contact 801-336-3303 and one of our techs will connect remotely and complete the software setup for you.
Already have the integration module and looking for a faster setup?
Follow the steps
below to finish setting up your customer display on your own.
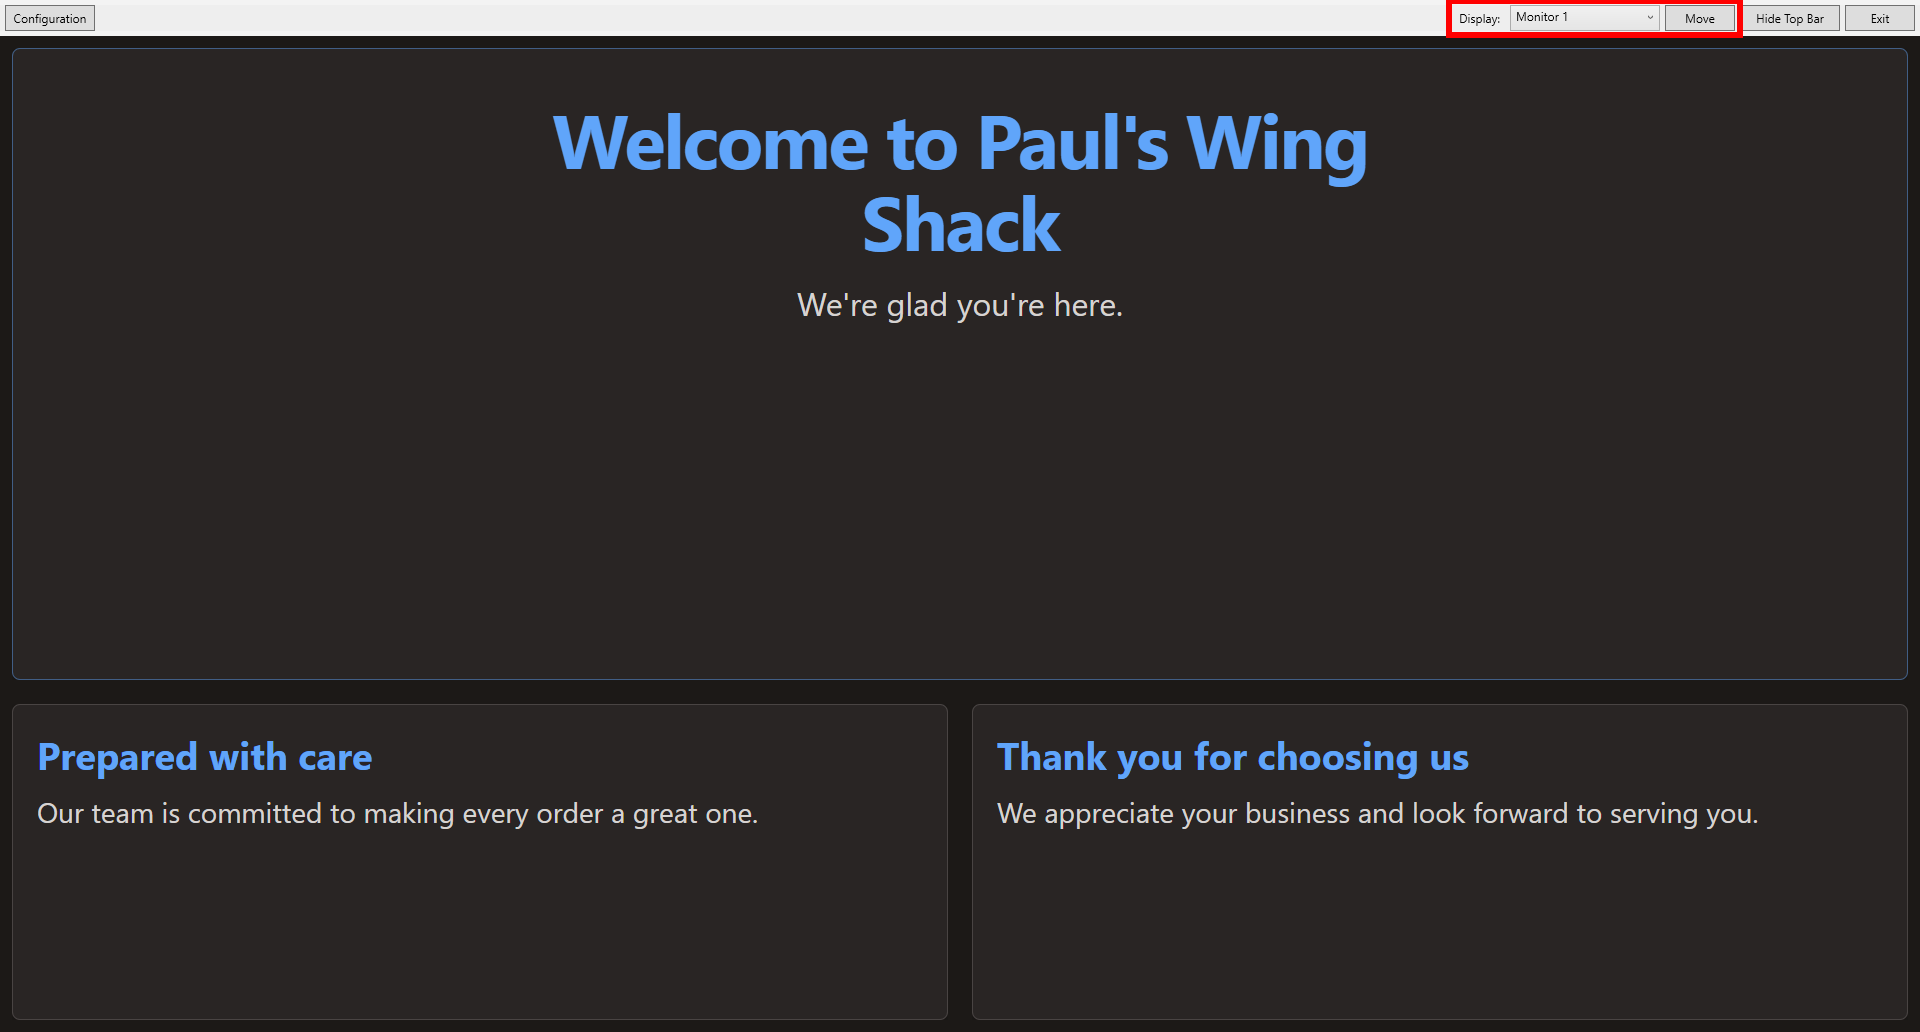
Step 7 — Select the Customer Display Screen
Choose which monitor displays the customer display software by opening the customer display software and using the Display dropdown near the top of the screen. Select the monitor you want the software to appear on, then click Move to move the customer display software to that screen.
Step 8 — Enable the Customer Display
Open BPA on your Elite III terminal and navigate to Miscellaneous Definitions, then Printers & Devices, and enable Customer Display.
Step 9 — Select the Customer Display
Select the customer display from the list of available devices. It may appear as
Display-001 or a similar device name.
* If the customer display does not appear
in the list, click the Test Connection button and try selecting it again.
Step 10 — Test the Connection
The Customer Display Server URL should automatically populate. If the URL does not appear, try disabling and re-enabling the Customer Display checkbox. Once the URL appears, select Test Connection to verify the connection.
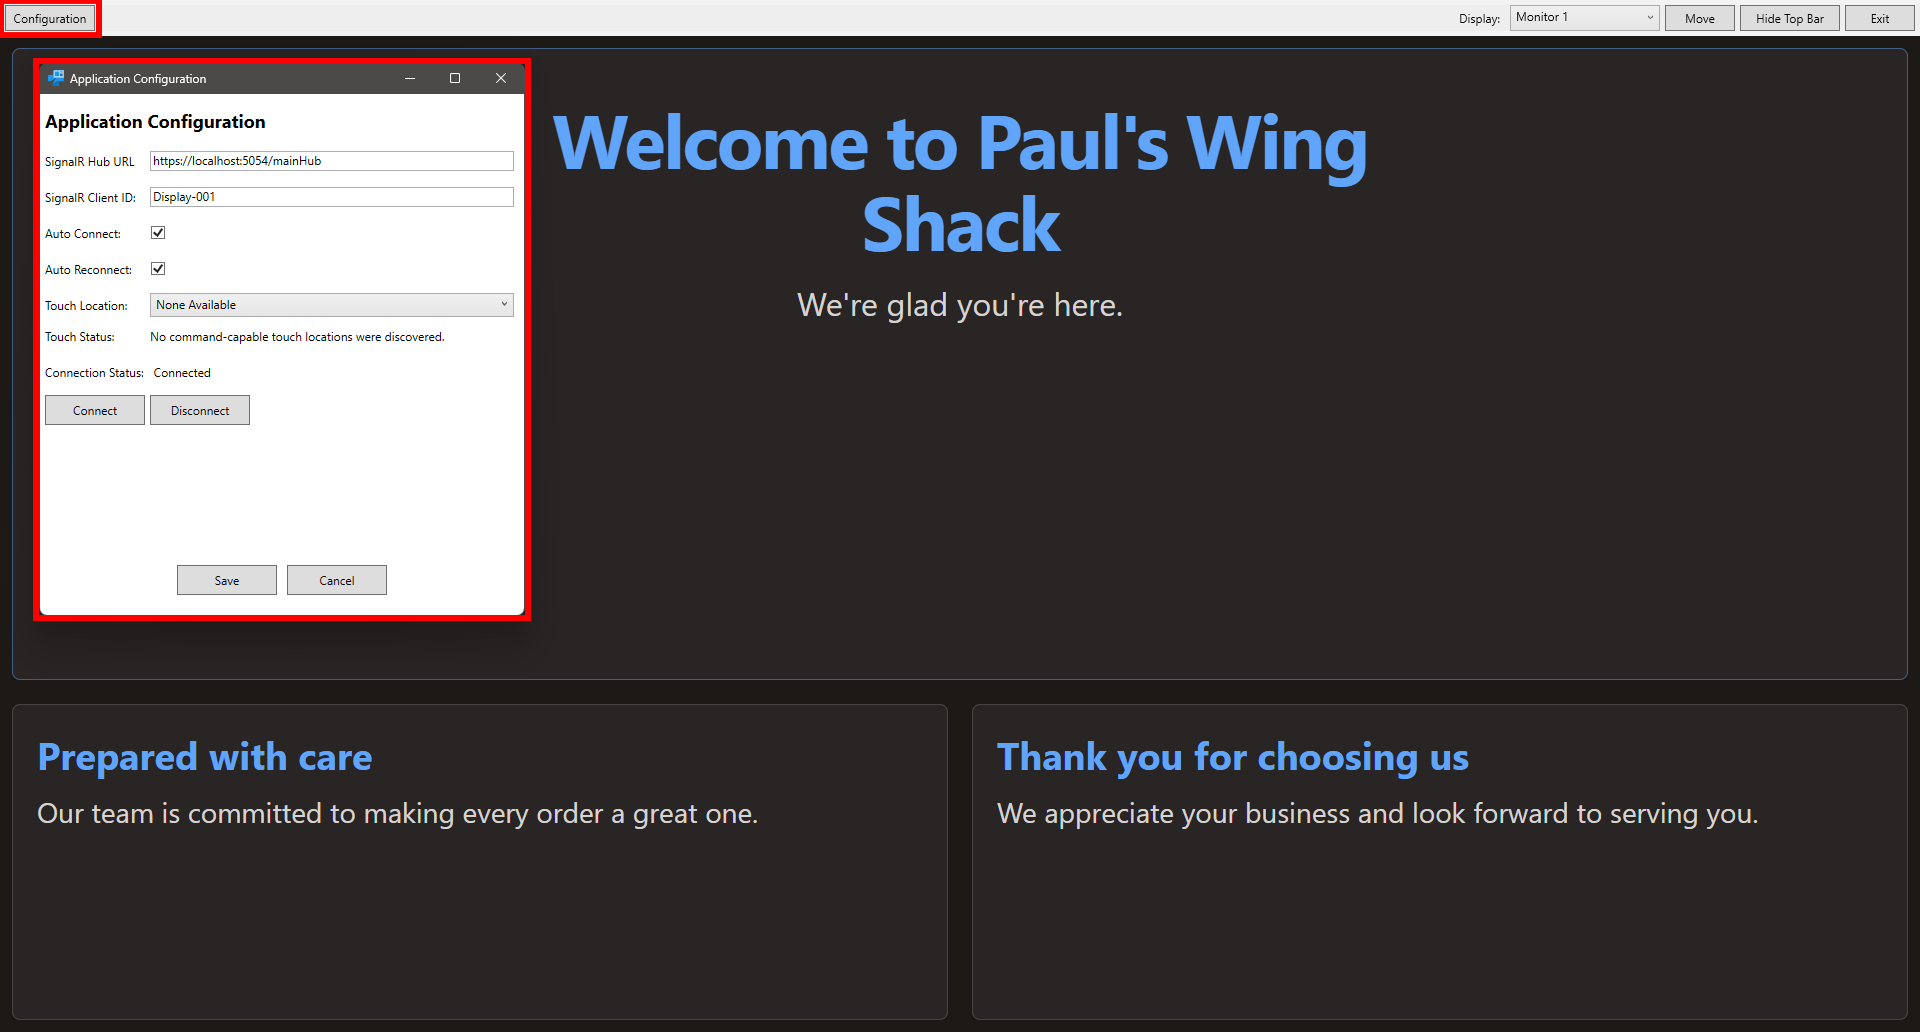
If the URL still does not appear or the connection test fails, open the Customer Display software and select Configuration in the top-left corner. Make sure the Connection Status shows Connected. If it does not, select Connect and wait for the status to change to Connected.
Step 11 — Test a Transaction
Test a transaction to confirm that items, totals, and discounts are displaying correctly on the customer screen.
Need Some Assistance? We've Got Your Back!
If you prefer, our techs can take care of the entire setup process for you. Please contact 801-336-3303 and we’ll be happy to get everything set up for you.