Assigning Online Menus
We'll start by choosing what menus you want to be available for online ordering.
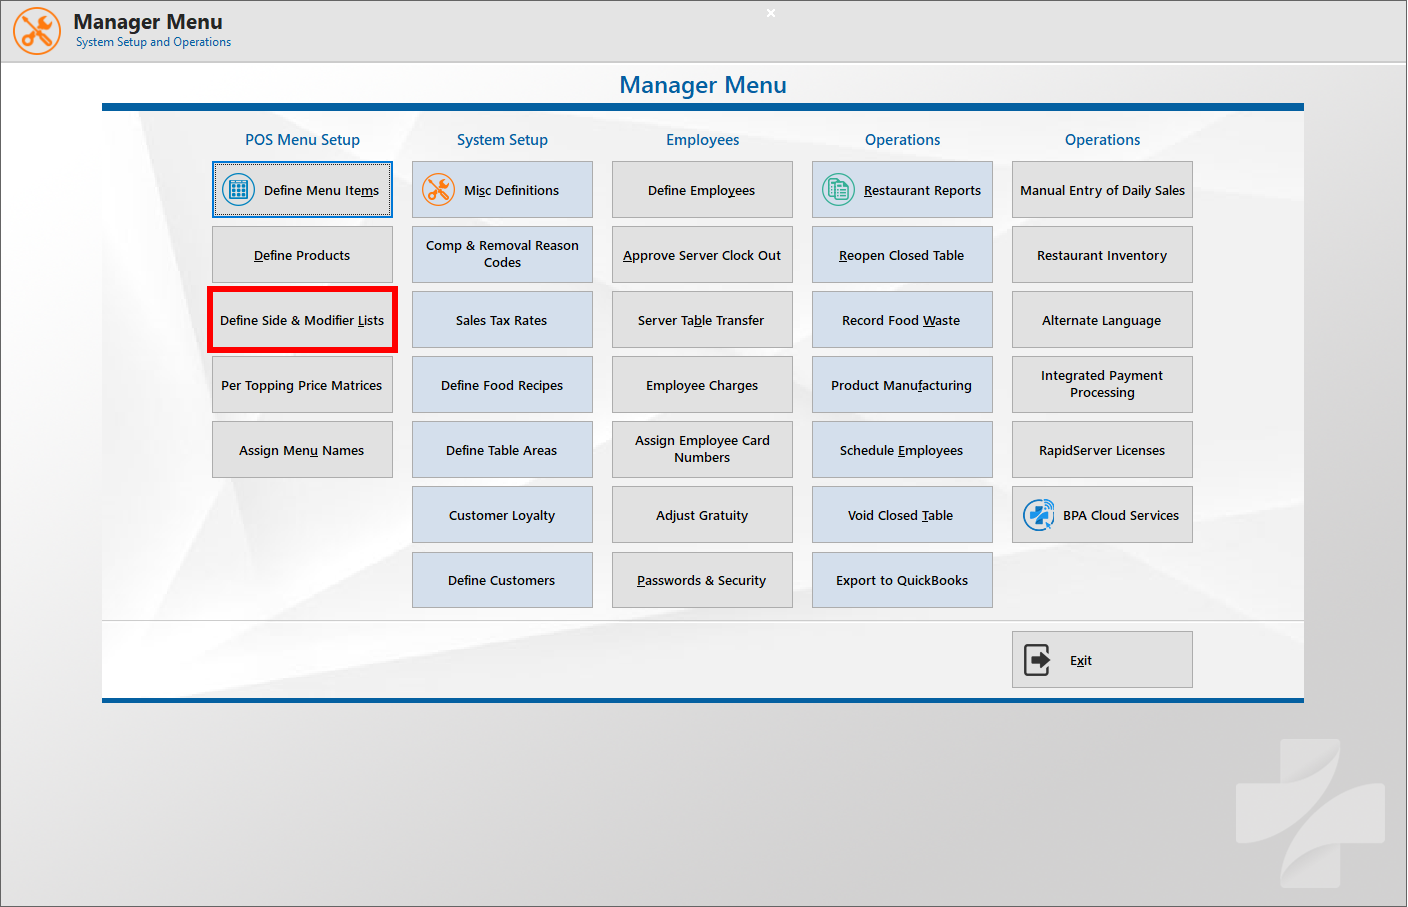
First go into the Restaurant System, Then into Manager Functions, and click on Assign Menu Names.
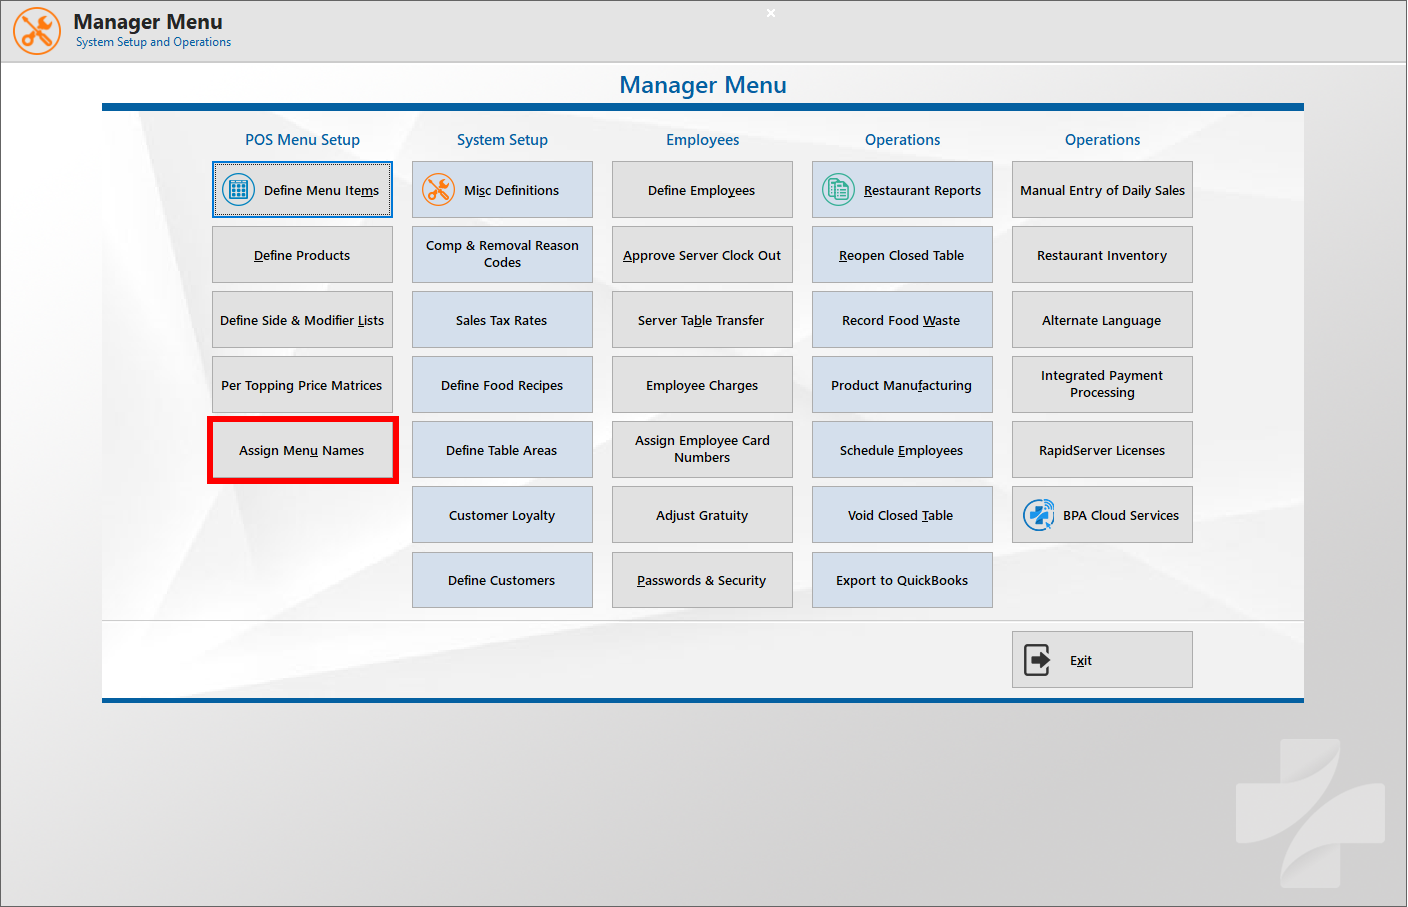
Once there, find the menu you want to show up for online ordering and select show the "Show On Web" box. You can also add a Web Description of the menu in this same section.
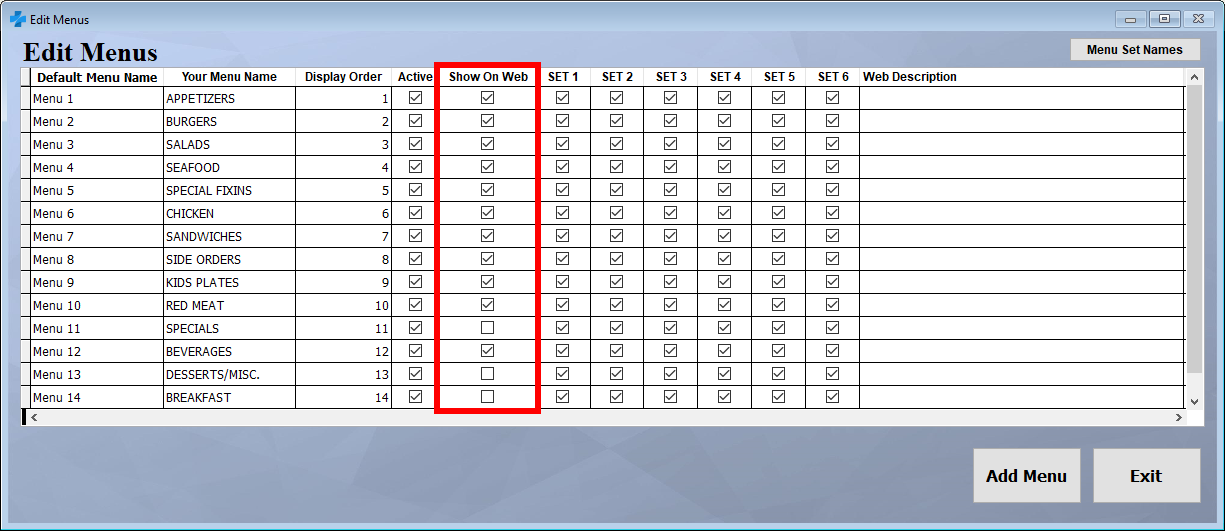
If you assign menus to different sets, you can specify the times that each set will be active in the EatOnTheWeb Admin dashboard.
After you exit those settings will save.
Menu Items
Next, we will choose what menu items we want on our online menu.
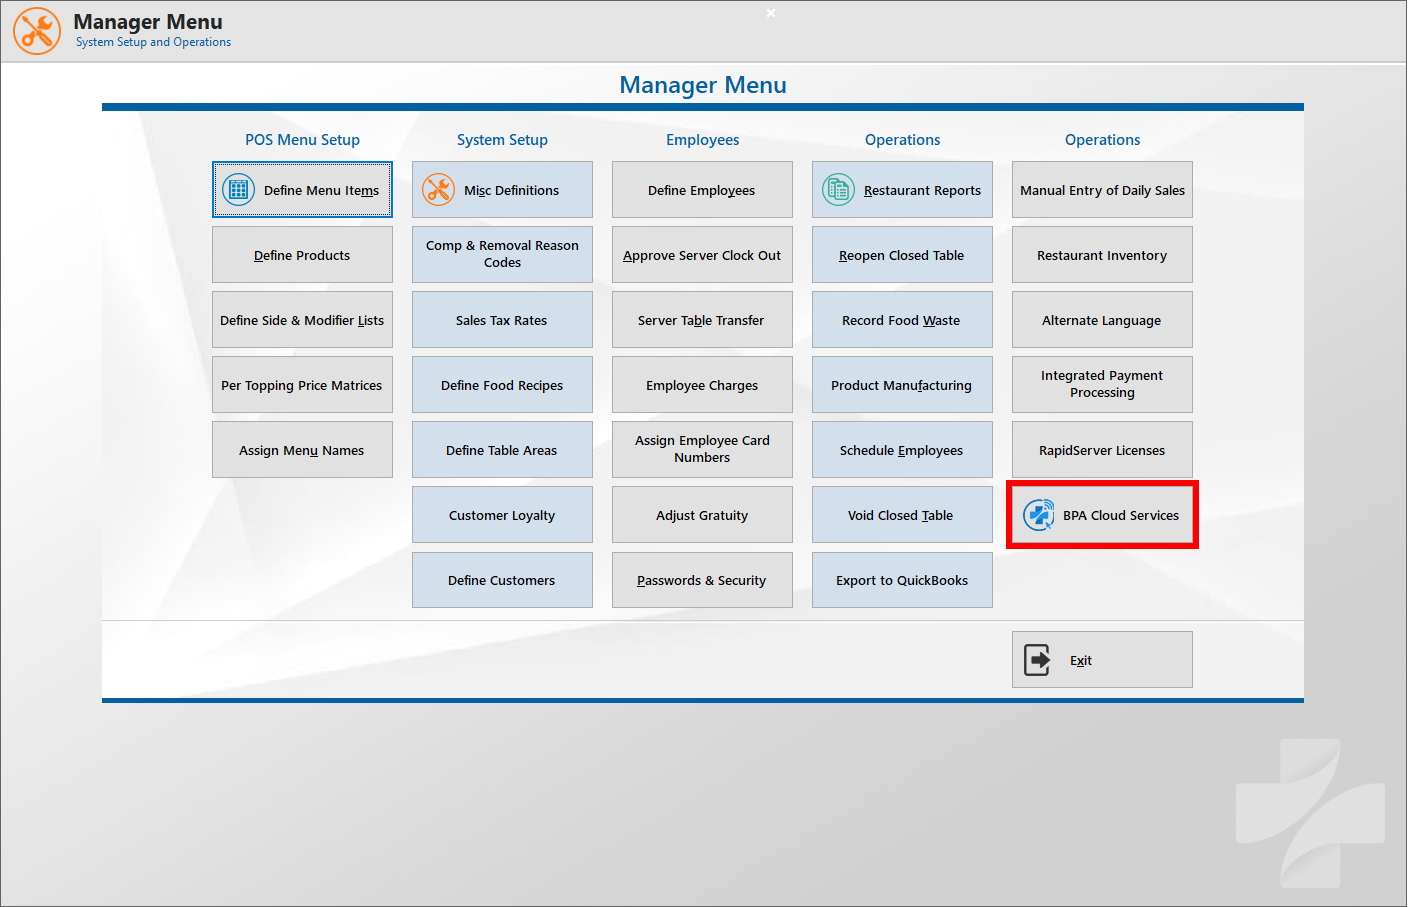
Start by going into the "BPA Cloud Services."
Click on "Define Online Menu Items."
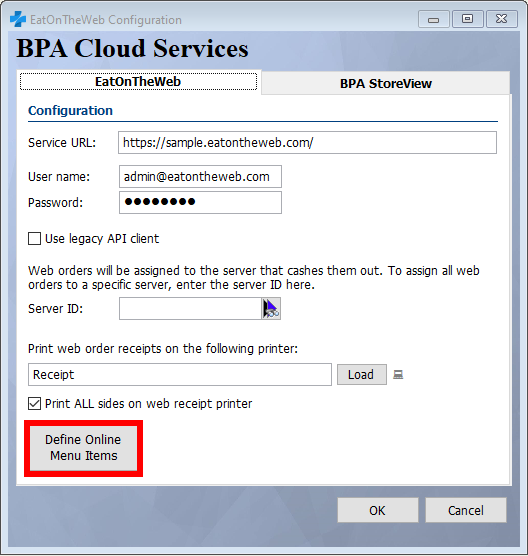
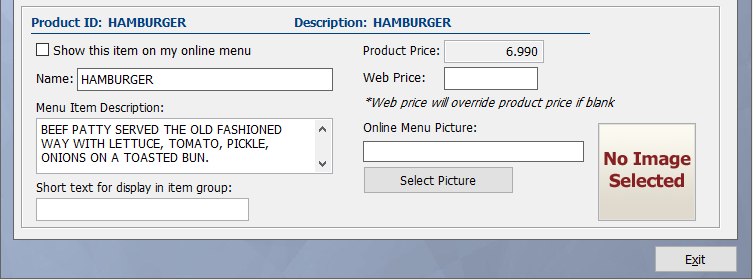
Select the Enabled Field for the items you want to offer online.
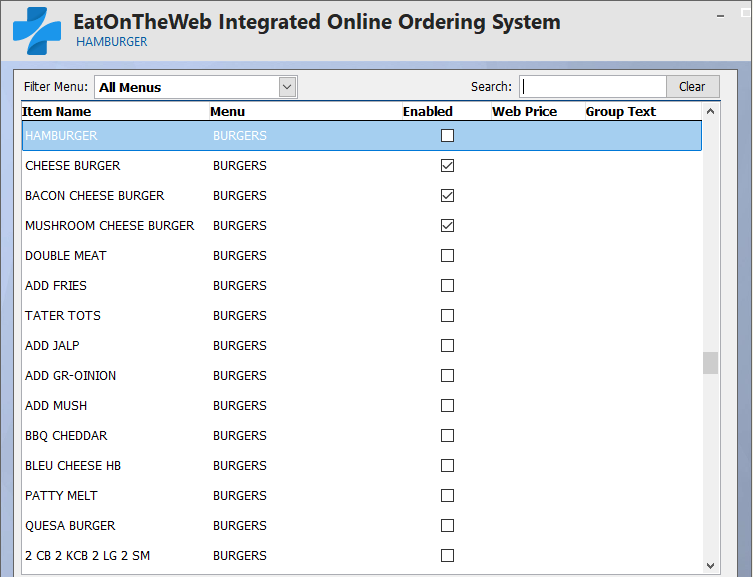
When you select that product, you can modify the Name of the product, add in a Web Price if you want the price is different than the regular Product Price, and you may add in a Menu Item Description for that specific item.
If the item is in a Menu Item Group you will also need to add in a Short text for Display in Item Group.
Note: If the menu button is within a Menu Item Group and does not have a name in the Short Text for Display in Item Group then the button will not appear on the menu.
After you exit this screen it will also save your settings.
Side and Modifiers
Next, we will choose what Sides and modifiers we want to add to our online menu.
Begin by going into "Define Side and Modifier Lists."
Select the side list you want to show online and make sure the "Show on EatOnTheWeb Online Ordering" at the bottom is selected.
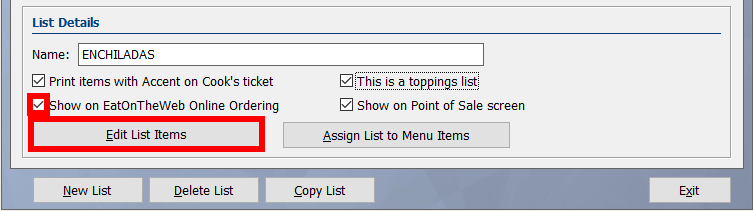
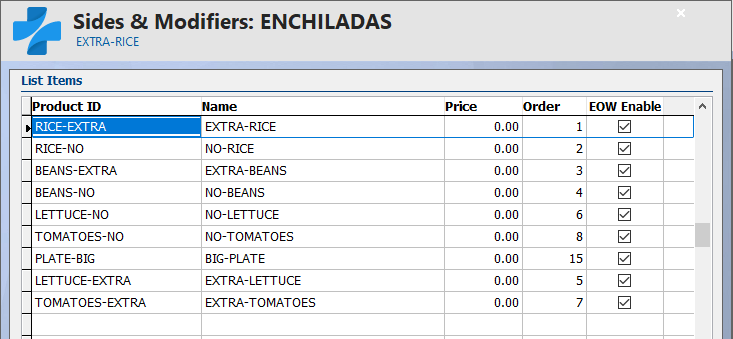
Once you have that selected click on "Edit List Items," you can then select individual items on that side list to show up online by selecting the "EOW Enable" box.
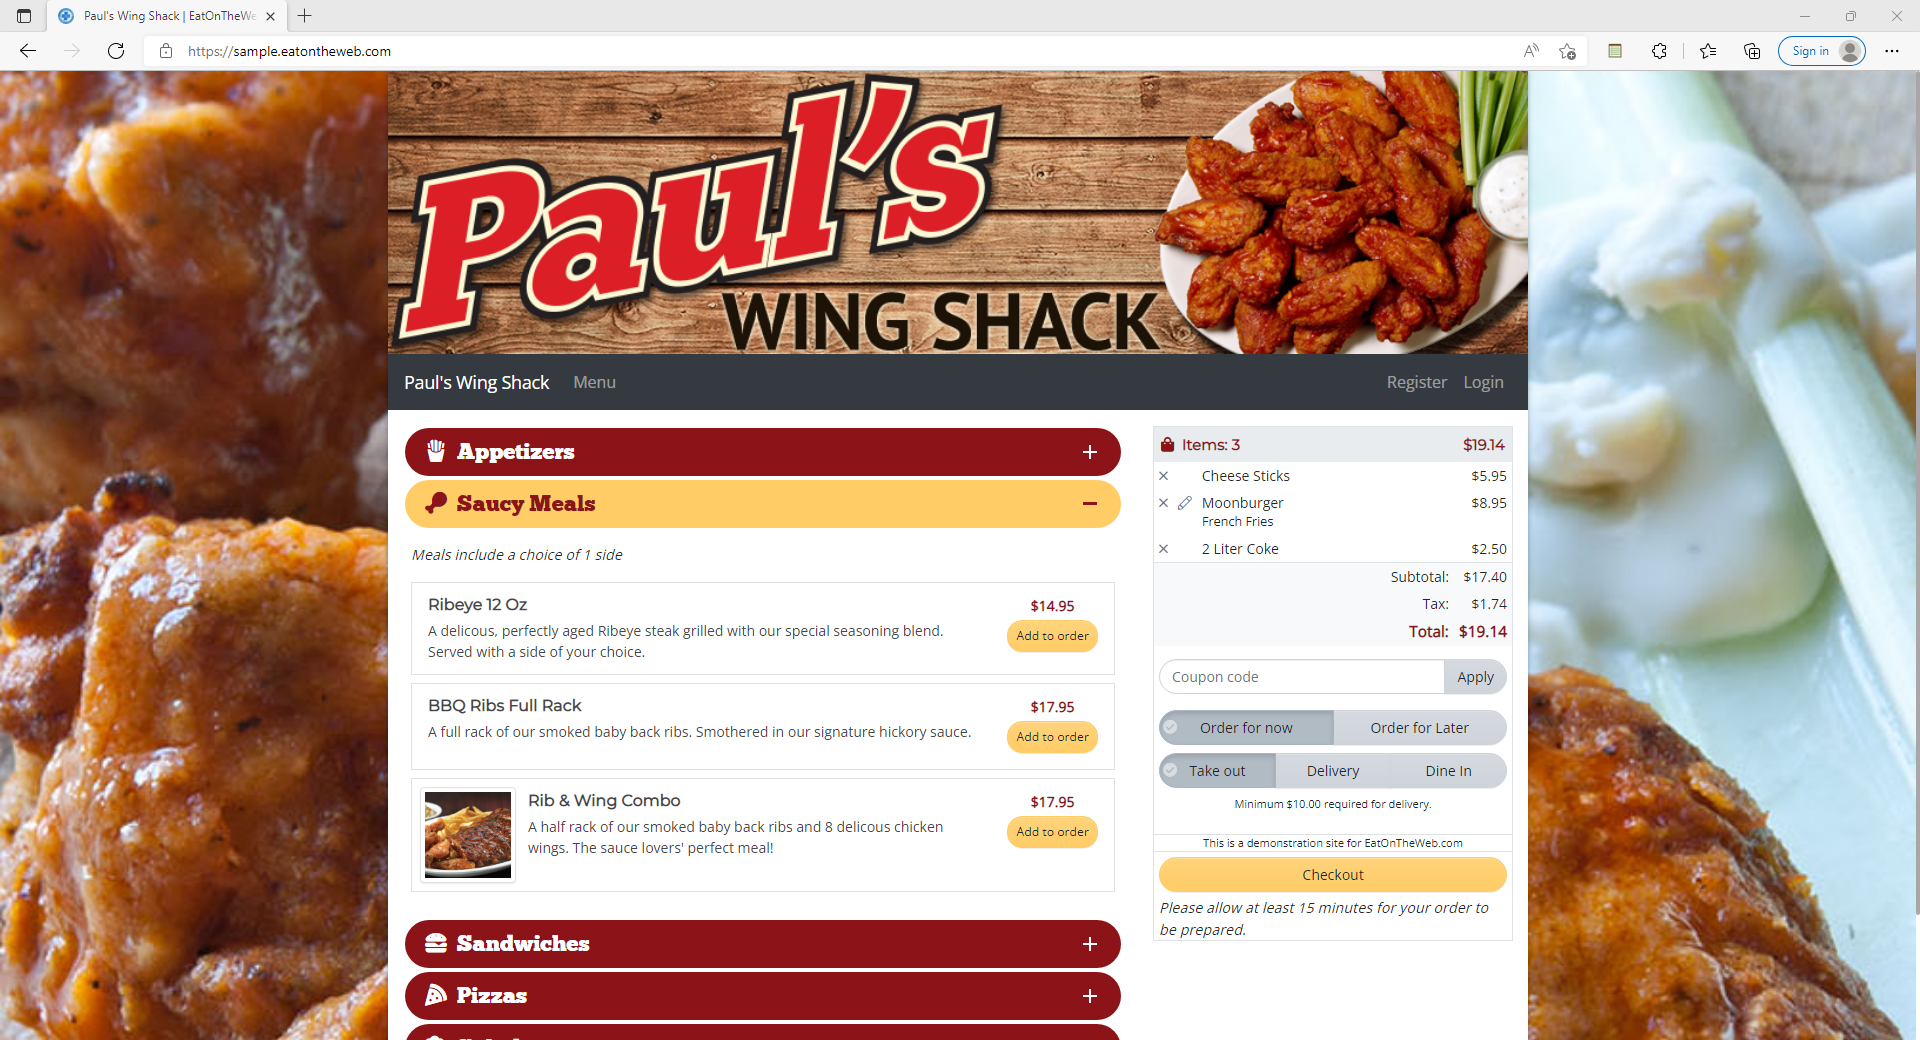
Uploading the Menu Changes
When you have finished selecting the menu tabs, assigning the buttons, and assigning the side lists for your online menu you will need to update the changes you have made to your menu. When you have the Eat on the Web (EOW) software installed on your computer you will need to select the EOW icon on the taskbar on your computer.

If the software is working properly then the Service Status should say Running and the EatOnTheWeb server status will say Connected. If this doesn’t then you need to press Start under the Service Options.
When you are ready to update the menu press the "Update Menu" button and wait for the prompt that will tell you the menu update has completed.
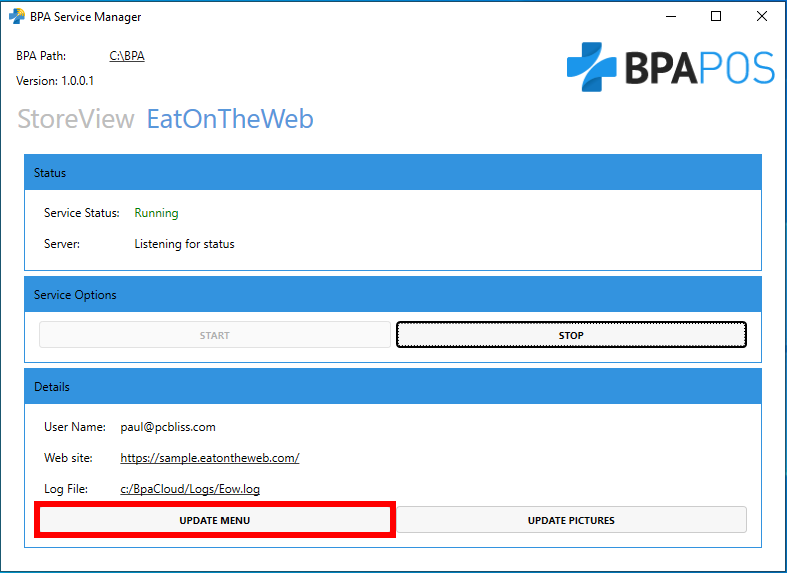
Then you may click on the link to the website to view the menu changes.